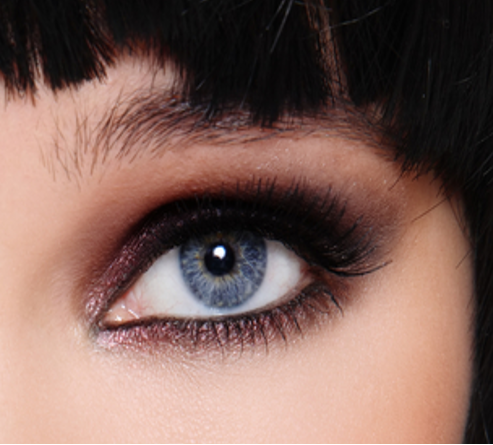
The smoky eye has long been a makeup classic, revered for its sultry allure and timeless elegance.
It is especially useful to minimise overly large and prominent eyes, extend round eyes to give a more 'almond' appearance, and it suits hooded and Asian eyes perfectly. Those who should avoid are smoky eye are people with close-set eyes, deep-set eyes, or overly small eyes (unless done in a light shade).
In this step-by-step tutorial, we'll guide you through the process of creating the perfect smoky eye.
Step 1: Gather Your Tools and Products:
Eyeshadow primer: Prepping your eyelids with primer helps create a smooth base for your eyeshadow and ensures long-lasting wear.
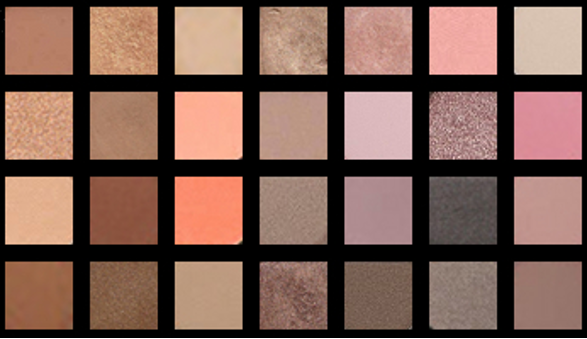
Eyeshadow palette: For this look, choose two colours of eye shadow – a light, base colour and a darker contrasting colour. See the next step for more details on how to choose the correct eyeshadow.
Eyeliner: Opt for a creamy eyeliner pencil or gel eyeliner in black or dark brown for added intensity. If you have a pale skin tone, you may find browns or greys more suitable than a harsh black.
Eyeshadow brushes: Invest in a few high-quality brushes, including a flat shader brush, a fluffy blending brush or bullet brush, and a small angled precision brush for detailing.
Mascara: Finish off your smoky eye look with several coats of volumizing mascara to add length and definition to your lashes.
Step 2: Choosing the correct colour eyeshadow
A smoky eye is traditionally done in a darker shade such as charcoal, deep brown or grey. However, the application technique can be used with mid-tones, bright colours or lighter shades also. A lighter shade will achieve a subtler daytime effect, brighter colours can be a fun fashion statement, and darker shades are perfect for an evening out or photoshoot.
HOT TIP for Mature-age eyes: Matte finishes are best if you have a crepey eyelid texture, as shimmery shadows can reflect light and enhance the appearance of wrinkles. Otherwise, you can choose from both matte and shimmery finishes.
BLUE EYES
Cool blue eyes: wear cooler shades of brown, cool taupes, cool pinks, charcoal or greys.
Warm blue eyes: these look great in orange based tones such as terracottas, bronzes, peaches, warm browns, warm taupes and warm blacks.

GREEN EYES
Green eyes: These benefit from shades with a touch of red underneath such as plums, reddish-browns and pinks. Warm taupe is also a particularly nice shade!

BROWN EYES
Brown eyes: The luckiest eye colour in terms of versatility! Brown eyes look stunning with most shades - especially jewel tones like emerald, amethyst, gold and blue. Match the eyeshadow colour to the warmth or coolness of your eye and skin colour.

HAZEL EYES
Hazel eyes: To determine which are the best colours, first see which hue is more dominant eg. brown or green, then follow the recommendations above for that colour.
Step 3: Prime Your Eyelids
Apply a small amount of eyeshadow primer to your eyelids and blend it evenly from the lash line to the brow bone. This will help prevent creasing and ensure that your eyeshadow stays vibrant throughout the day or night.
Step 4: Apply Your Eyeshadow
Using a base shade and a flat shader brush, apply an eyeshadow that matches your skin tone from the lash line right up to the brows. This will be used to blend your darker colour into shortly.

Next, apply a darker eyeshadow shade that matches your eye colour (see above) all over your mobile eyelid. This is the part of the eyelid that sits on your eyeball and moves when you open and close your eyes. Bring this colour all the way from the lash line up to the crease.
Also dust a line of the darker eye shadow all the way along the lower lashline, getting thinner towards the inner corner of the eye.

Step 5: Blend, Blend, Blend!
The key to a flawless smoky eye is seamless blending. Using a clean fluffy blending brush or bullet brush, gently blend your 2 eyeshadow colours into each other, to soften any harsh lines and create a diffused, gradient effect. You can 'pull' the eyeshadow outwards towards the temples to create a 'cat eye' effect (this is especially recommended for round eye shapes to give a more almond appearance, but is not recommended for wide-set eyes as it may increase the illusion of the eyes being even further apart than they already are.

Step 6: Line Your Eyes For added drama
Line your upper and lower lash lines with a creamy eyeliner pencil. Smudge the liner with a small angled brush to soften the line and enhance the smoky effect.
TOP TIP: To prevent the pencil liner from smudging throughout the day as the wax in the product heats up and melts due to your body temperature, take a tiny amount of a matching colour eyeshadow on a small angle brush and gentle press it into the pencil liner to 'set' it and hold it in place all day long.

Step 7: Finish with Mascara
Complete your smoky eye look by applying several coats of volumizing mascara to your upper and lower lashes. Wiggle the mascara wand side to side from the base of your lashes to the tips to add length and definition.
If your mascara ends up clumpy, use an eyelash comb to separate and define the lashes.

Congratulations, you've mastered the art of the smoky eye! Whether you're channeling Old Hollywood glamour or modern-day chic, the smoky eye is a versatile makeup technique that never goes out of style.
So go ahead, experiment with different colours and finishes, and unleash your inner smouldering goddess with confidence and flair. And remember, all rules in makeup were made to broken!
Have fun and we hope this smoky eye makeup tutorial has helped!
#smokyeyetutorial #howtodoasmokyeye #learntoapplymakeup #makeuptips #smokeyeye #smokyeye #eyeshadowtechniques #makeuplesson #perthmakeupartist #makeupartistperth #eyemakeup #eyeshadow #howtochooseeyeshadowcolours #whateyeshadowcolourssuitme


Comentarios